
Installing your Pan-Tilt Indoor Cam
View/download PDF manual (English, Français, Deutsch, Italiano, Español, Nederlands, Svenska, Dansk, Suomi, Norsk, العربية)Physically install your Pan-Tilt Indoor Cam with this step-by-step guide.
Hardware included

Tools needed


- Download the Ring app.
- Scan the QR code on your device.
- Choose a location.
Flat installation
Place your camera on a level surface with 16.5 cm (6.5 inches) of space in every direction and plug in.

Wall installation
- Use the mounting plate as a guide to mark screw holes on the wall with 16.5 cm (6.5 inches) of space in every direction.
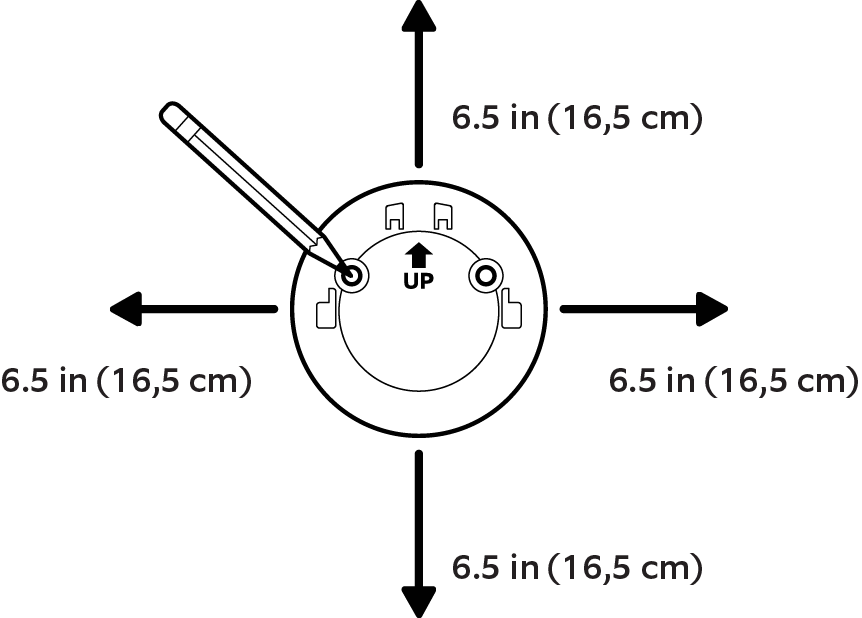
- Install the mounting plate with the UP arrow pointing up.
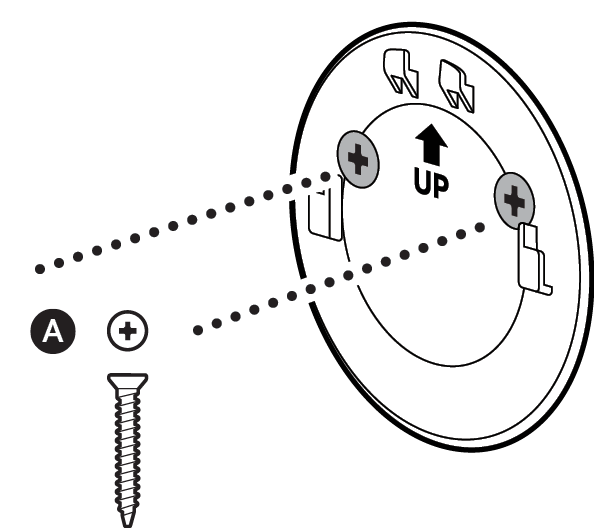
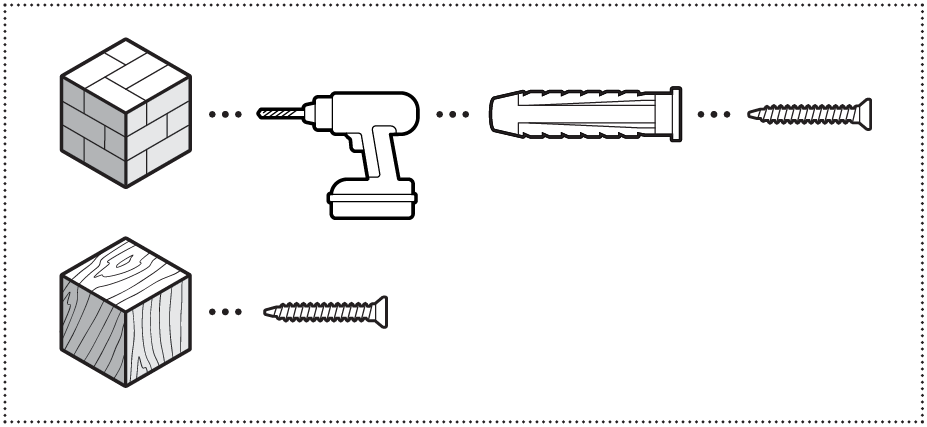 On stucco, brick, or concrete, use a 5mm (3/16 inches) masonry bit to drill holes for the included wall anchors.
 - Run the power cable through the hole in the mounting bracket and plug in.

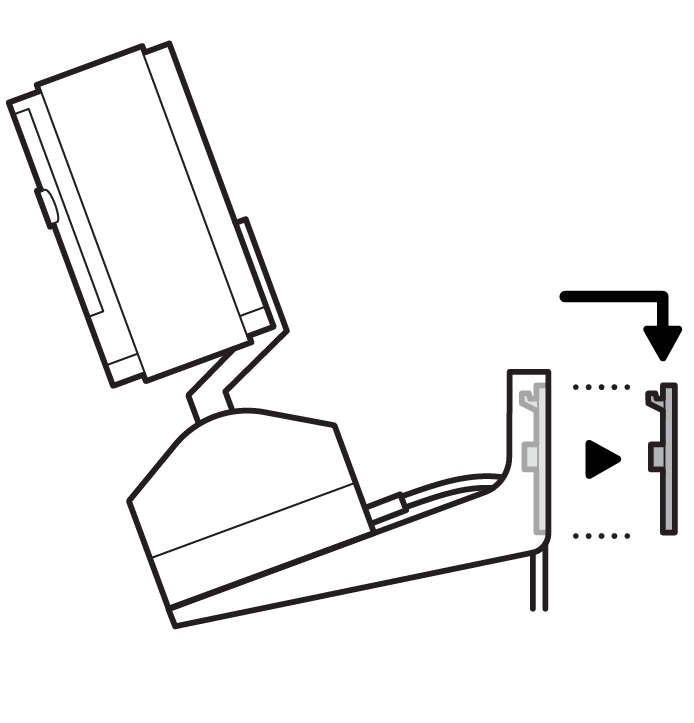
- Secure your camera to the mounting bracket by sliding until you feel a click.
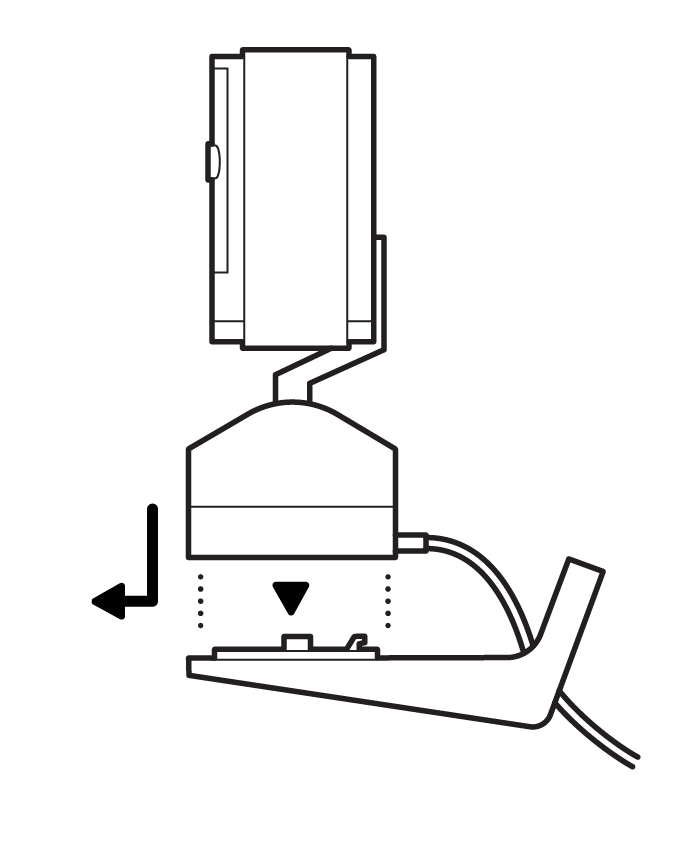
- Secure your camera and bracket to the mounting plate by sliding until you feel a click.


Ceiling installation
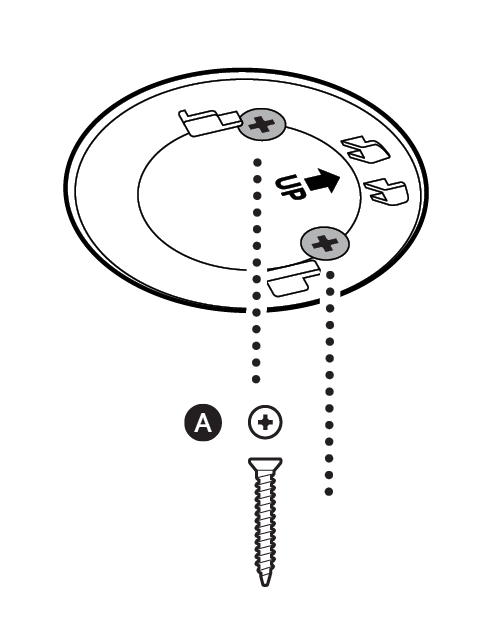
- Use the mounting plate as a guide to mark screw holes on the ceiling with 16.5 cm (6.5 inches) of space in every direction.

- Install the mounting plate with the UP arrow pointing opposite of your desired viewing direction.
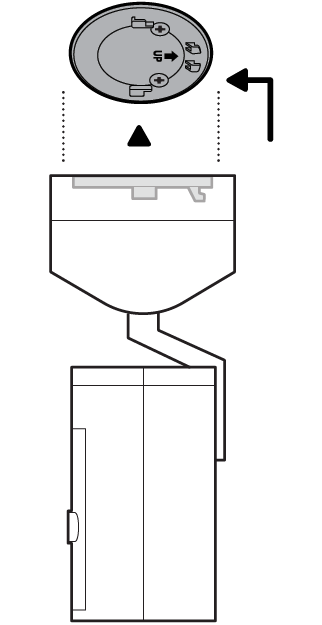
 On stucco, brick, or concrete, use a 5 mm (3/16 inches) masonry bit to drill holes for the included wall anchors.
 - Secure your camera to the mounting plate by sliding until you feel a click.
- Plug in the power cable.
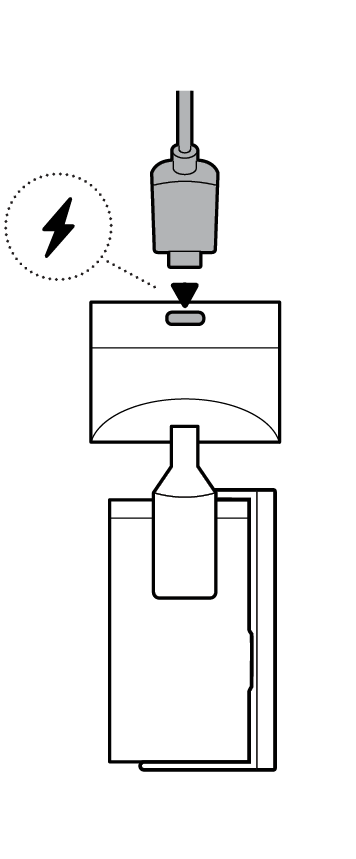
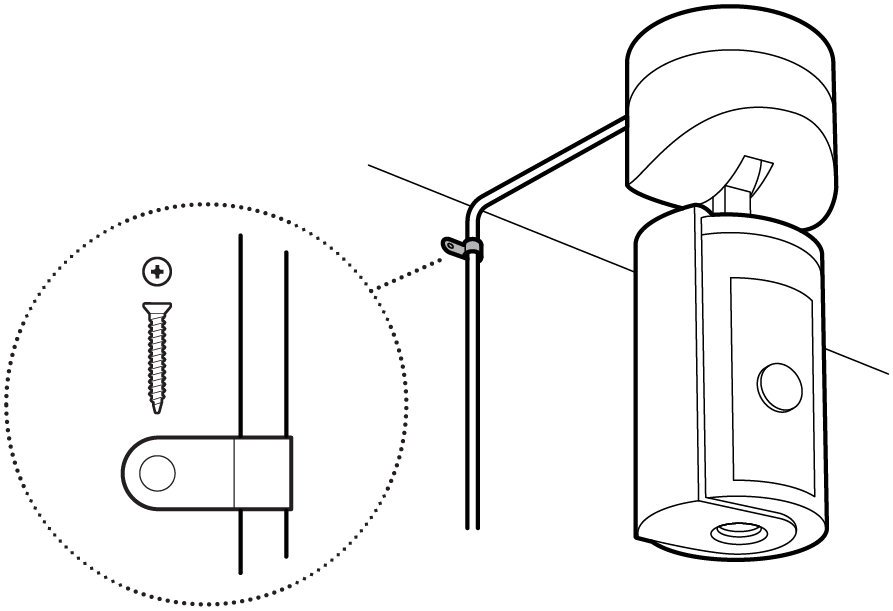
- Anchor the power cable to the wall or ceiling with the included cable clip.


Using the privacy cover.

Removing the privacy cover.

Attaching the privacy cover.

Last updated 11 months ago