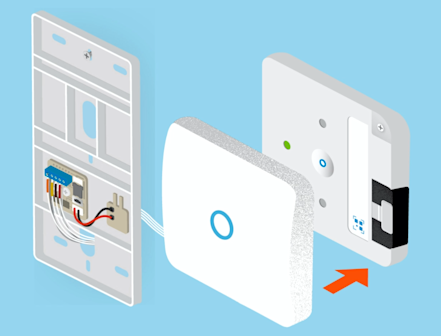
Mounting Ring Intercom with double-sided tape or screws
Once you have followed the steps in the Ring app to setup and connect your Ring Intercom wires, it is time to mount your Ring Intercom. You can use either the included double-sided tapes or screws, based on the surface of your wall. Follow the steps below to mount your Ring Intercom according to your preferred mounting option.
Mounting Ring Intercom with double-sided tape
Your Ring Intercom comes with double-sided tape on the back for easy installation.
Note: Do not mount your Ring Intercom until you have completed the wiring and you know the device’s exact location, as the double-sided tapes cannot be reused.
Important: Double check the condition of your walls before applying the tape. The surface should be smooth and flat. We recommend installing your Ring Intercom with screws if your wall is:
- Textured or porous
- Covered by VOC finish
- Covered by wallpaper
- Covered by paint that’s not cured
- Covered by non-stick paint
- Made of uncovered brick, Styrofoam or foamed materials
- Aged or delaminated
- In an environment with a humidity level above 80%
- In an environment with a temperature below 0 degrees celsius or above 35 degrees celsius
If your wall meets any of the above conditions, use the screws to mount your Ring Intercom instead, by following the instructions below.
How to mount Ring Intercom using double-sided tapes
To secure your Ring Intercom to the wall with the provided tapes, simply follow these steps:
- Clean the wall with alcohol.Note:Do not use household cleaners or water. Make sure the surface is clean and dry before applying adhesive.
- Find the desired location for placement. Remove the back liner of both tapes.Note:Avoid touching the adhesive with your fingers.
- When you have your device aligned straight, press firmly with both hands and hold for 30 seconds to ensure a firm attachment.
How to remove Ring Intercom and double-sided tapes
To remove Ring Intercom and double-sided tapes from your wall, simply follow these steps:
- Pull off the transparent pull tabs.
- Hold the device with one hand and use the other hand to pull the tape tab slowly and in line with the direction of the tape.
- Pull about 10 to 15 cm of tape and hold the stretched length of tape in your hand with your fingers near the remaining tape.
- Pull off the remaining tape.
Mounting Ring Intercom with screws
Your Ring Intercom comes with mounting screws.
How to mount Ring Intercom using screws
1. (Optional) Screw in your Ring Intercom (recommended when mounting on wood)
If you’re mounting on brick, concrete or stucco, you can skip this step.
- Place your device at the desired mounting location
- Using the included double-sided screwdriver, secure the device with the provided screws
2. (Optional) Pre-drill holes for the anchors (recommended when mounting on brick, concrete or stucco)
- Use your Ring Intercom mounting holes as a template to mark the install location. You will need to mount it close enough to your existing intercom that the cable can be easily connected.
- Use a power drill and 6 mm drill bit (not included) to drill holes at the desired mounting location.
- Insert the included plastic anchors (6 mm) into the holes. You may need to hammer the anchors in.
- Align your device with the anchors. Using the included double-sided screwdriver, secure the device with the provided screws
3. Install the faceplate
Reattach the faceplate of your Ring Intercom.

