Installing the Ring Pro Power Kit with your Existing Doorbell
The Pro Power Kit included with your Wired Doorbell Plus is a small device that makes sure that enough power is sent to your Ring Doorbell to function. It's required in order for your Ring Doorbell to function properly.
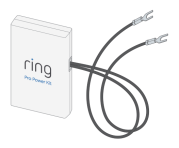
To install your Pro Power Kit, just follow the instructions below:
Important Notes:
- Before removing or attaching wires to your original bell, be sure that the power is turned off at the breaker box.
- If you're uncomfortable with opening up your original bell box or attaching and detaching wires, consult a licensed electrician.
Installing the Ring Pro Power Kit
- Remove the cover on your internal bell.
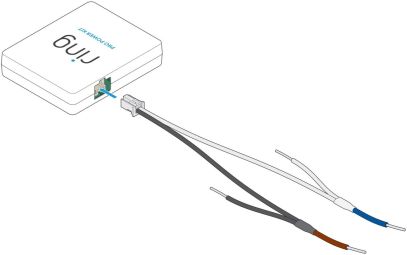
- Connect the wire harness to the Kit.
- Disconnect your bell's "Front" wire.
- Look for Wires labeled "Front" and "Transformer."
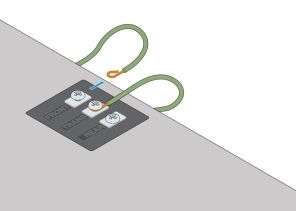
- Use the wire clips to connect the "Front" Wire to the black wire on the the Wire Harness.
- Note that the orange levers are very sturdy and will not break.
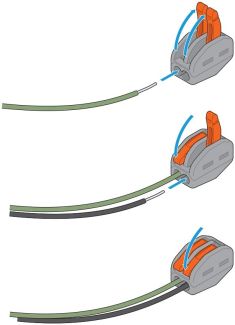
- Connect the brown end of the black wire to the "Front" terminal on your bell.
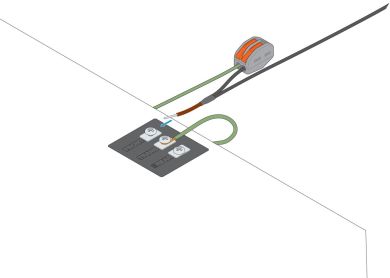
- Disconnect your doorbell's "Transformer" wire.
- Use the wire clips to connect the "Transformer" wire to the white wire on the Wire Harness.
- Connect the blue end of the white wire to the "Transformer" terminal on your bell.
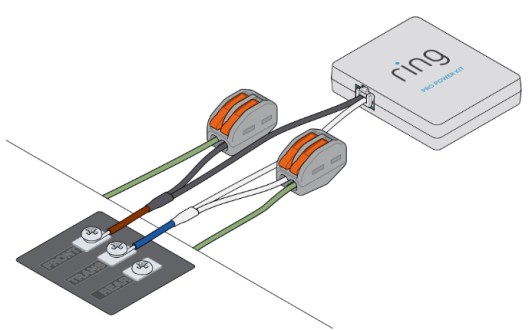
- Secure the Pro Power Kit inside of your bell, but don't let it get in the way of the moving parts.
- Replace the cover on your bell, turn the power back on at the breaker, and return to the front of your home to perform the in-app setup.
Last updated 7 months ago
